In this article, the importance of menus in WordPress websites is highlighted. Menus are a menu bar that displays links on a website, and WordPress has strong support for customization without much programming knowledge. The article provides a step-by-step guide on creating and managing menus in WordPress. It covers adding pages, posts, custom links, and categories to the menu, as well as saving the menu once it is complete. The article serves as a helpful resource for those looking to enhance the navigation of their WordPress website through the use of menus.
Hey there! In our previous discussions, we tackled some key aspects like Themes, Customize, and Widgets in Appearance. Let’s delve into the world of "Menu Creation" within the Appearance settings now. But hold on, have you ever wondered what exactly a menu is?
What is the menu?
A menu essentially serves as a navigation bar containing links on a website. WordPress makes it super easy to work with menus, even if you’re not a coding expert. The number of menus and where they appear can vary based on the theme you’re using.
For the sake of simplicity, let’s stick to a default theme featuring 2 menus, making it easier for you to transition across themes with differing menu setups.
Menu creation guide
To begin creating or managing menus, just head over to Appearance > Menu. Simple as that!
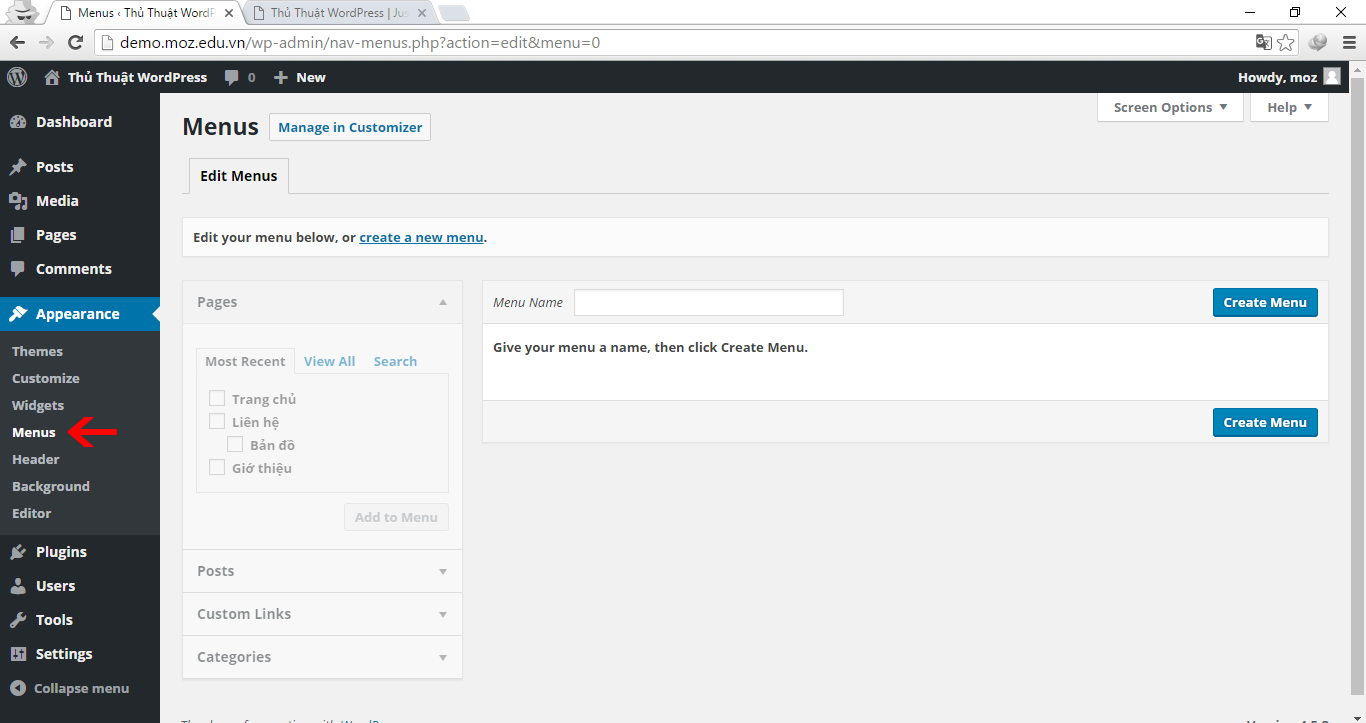
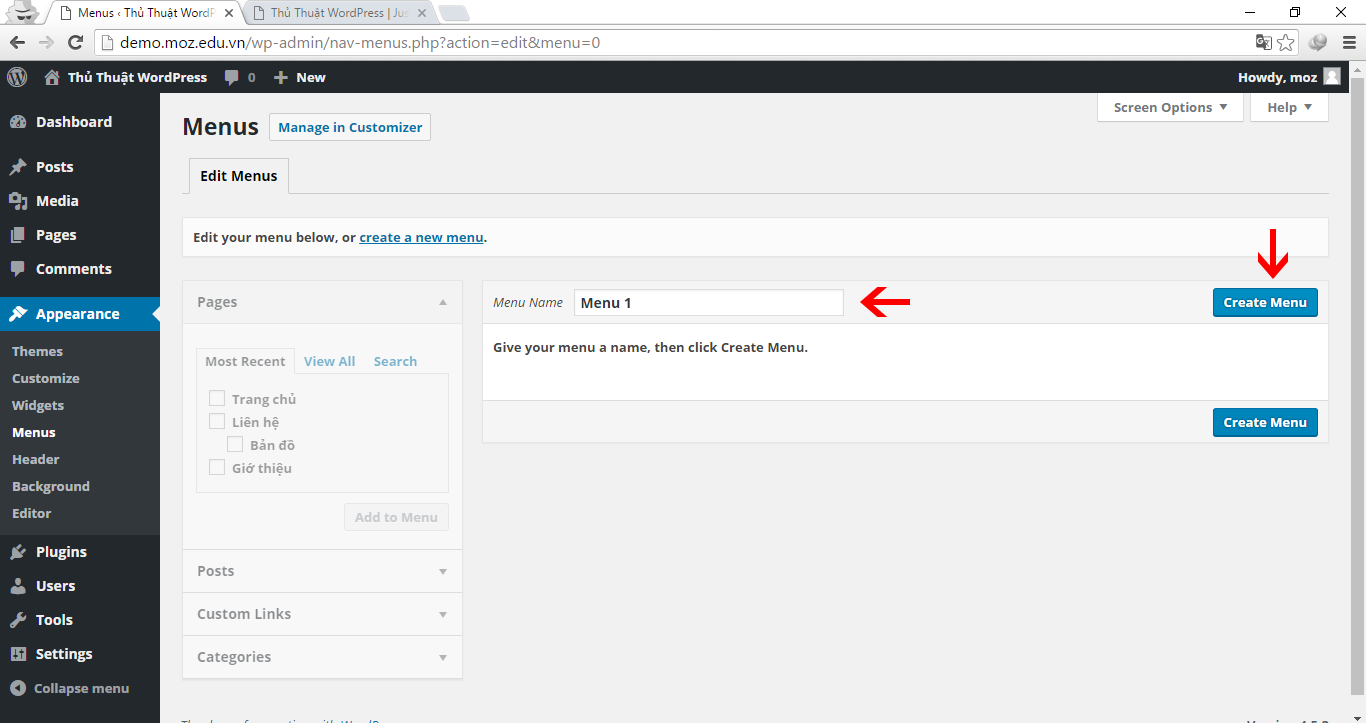
All you need to do is name your menu and hit Create Menu. On the left side, you’ll find various items like Pages, Posts, Custom Links, Categories that you can add to the menu, with the settings displayed on the right.
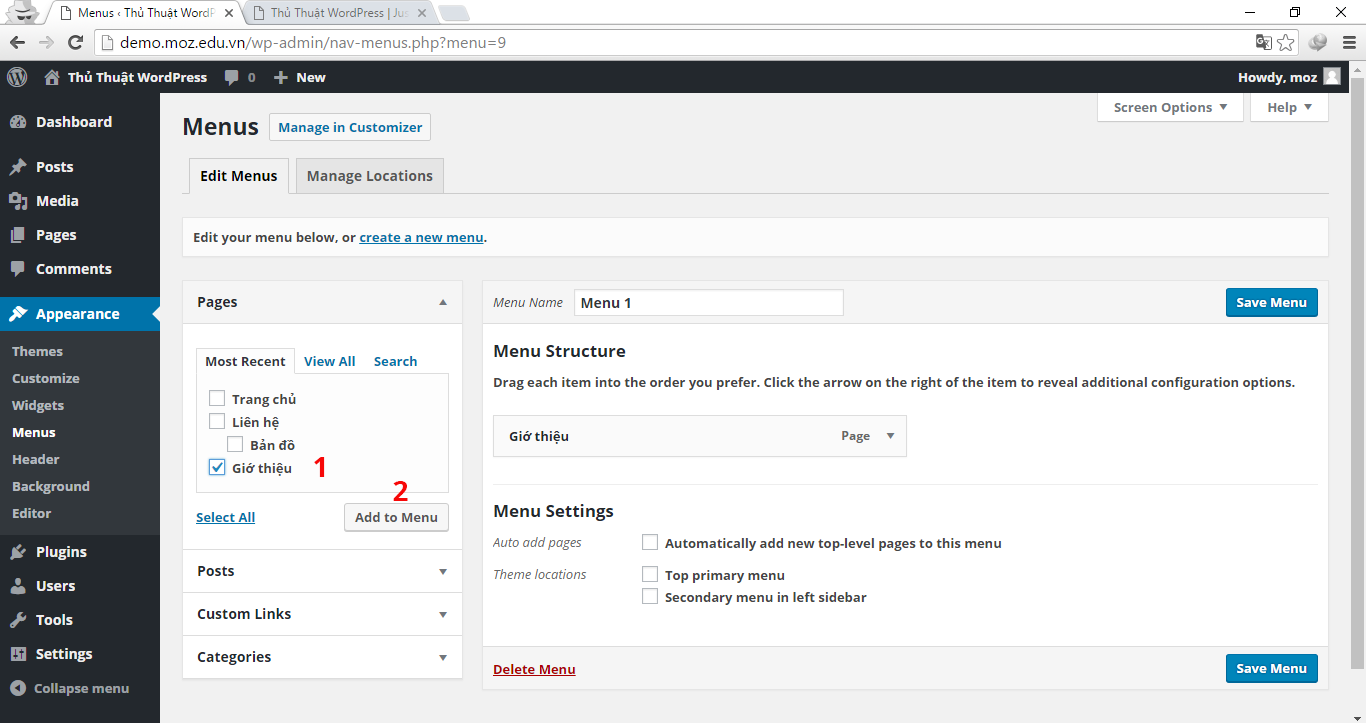
Add 1 page to the menu
In the Pages section on the left, simply select the pages you want to include in the menu and then click Add to Menu.
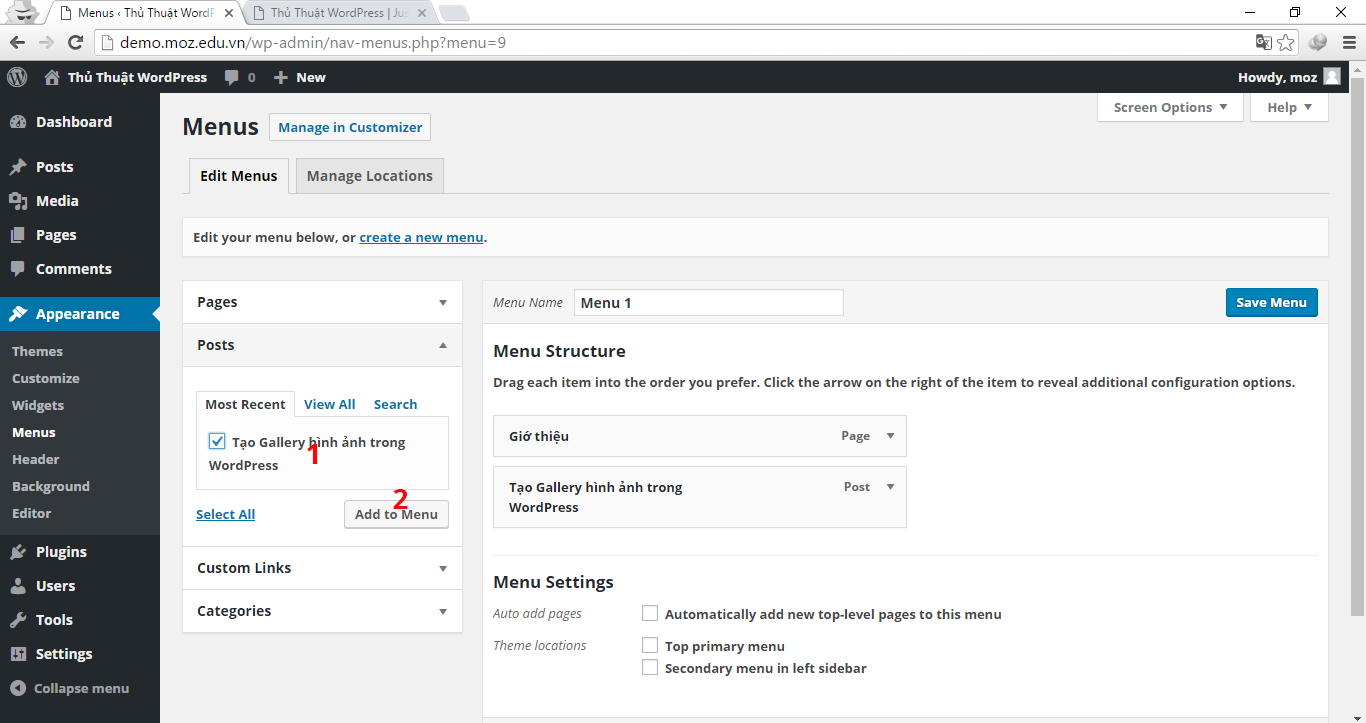
Add 1 post to the menu
Similar to adding a page, just choose the posts you want and click Add to Menu.
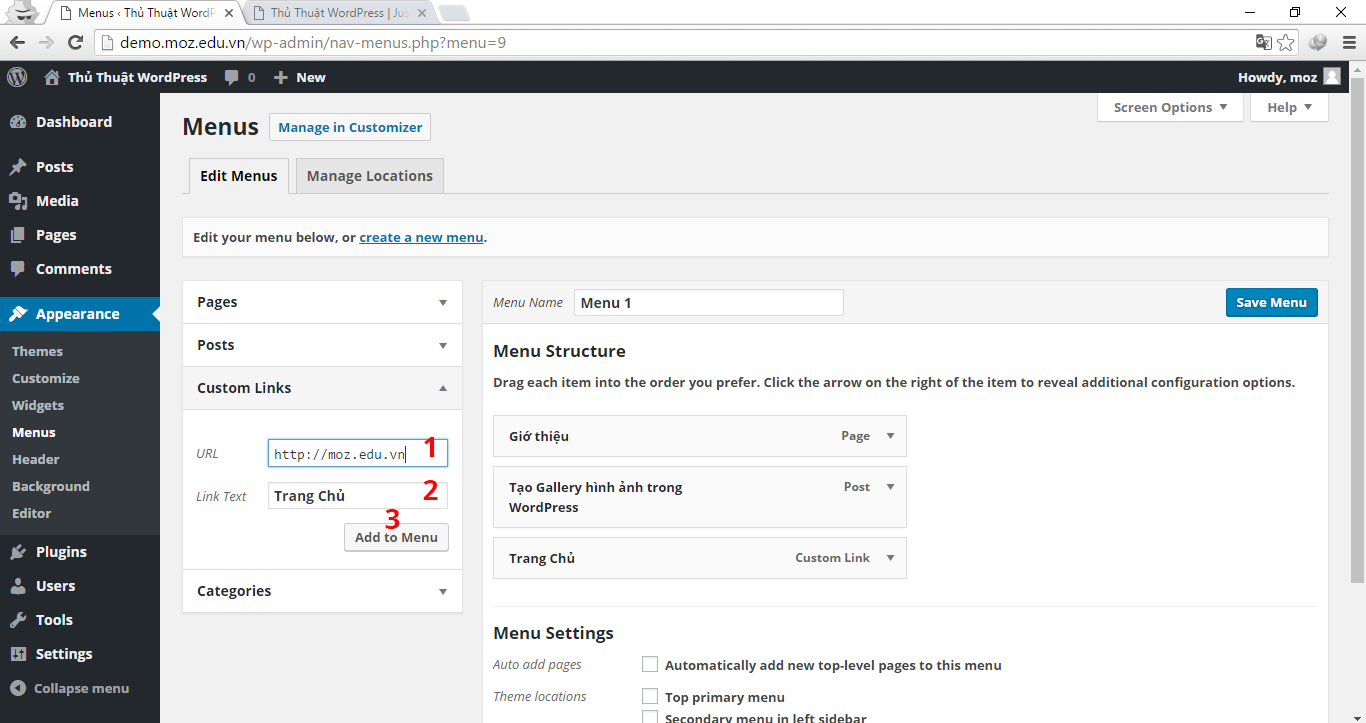
Add 1 Custom Link
Enter the URL and text link, then hit Add to Menu.
Add 1 Category to the menu
Select the category, then click Add to Menu just like before.
Once you’re done adding all your desired items to the menu, don’t forget to hit Save Menu to save your changes.
Epilogue
By following these simple steps, you’ve now created a menu. However, the menu won’t display just yet. Stay tuned for the next article where we’ll explore how to display the menu by selecting its location or installation process.
And if you’re interested, you can check out our other articles on WordPress like using Widgets here and editing and displaying menus here.
Keep exploring and creating with WordPress!


