The article discusses how to create a scarcity effect for a product using a WooCommerce product countdown timer to increase sales on a website. The process involves installing the plugin, setting up the countdown name and time, customizing the design, and configuring the product settings. It also provides guidance on how to use the countdown timer on individual product pages and the shop page. The tutorial concludes by encouraging readers to explore more WordPress tips and follow the website’s fan page for the latest articles.
Hey there! So, today we’re going to talk about how to create a scarcity effect for your product using the WooCommerce product countdown timer. This little trick can really grab your customers’ attention and boost your sales, so it’s definitely worth a try.
Installation:
To get started, just head over to your WordPress dashboard, go to Plugins, click on Add new, and then type in the keyword "Sale countdown Timer." Once you find the right plugin, just install and activate it.

How to use:
- General settings section:
Here you can set up things like the countdown name and time. This is where you customize the basics of your countdown.

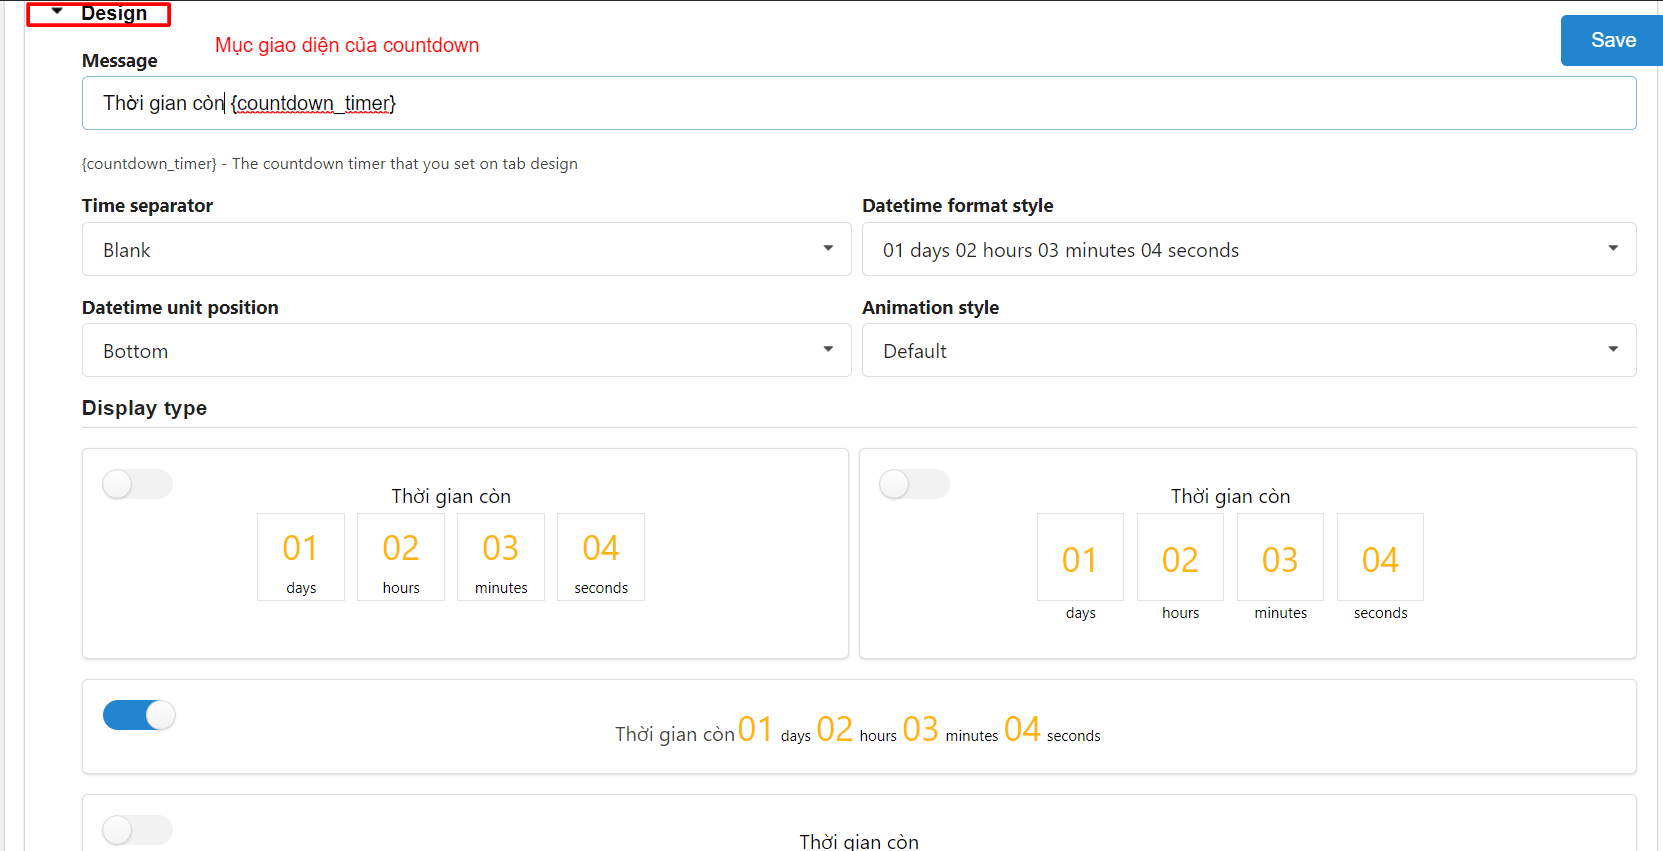
- Design section:
In this section, you can adjust the color and style settings for the countdown bar. Make it match your website’s design!

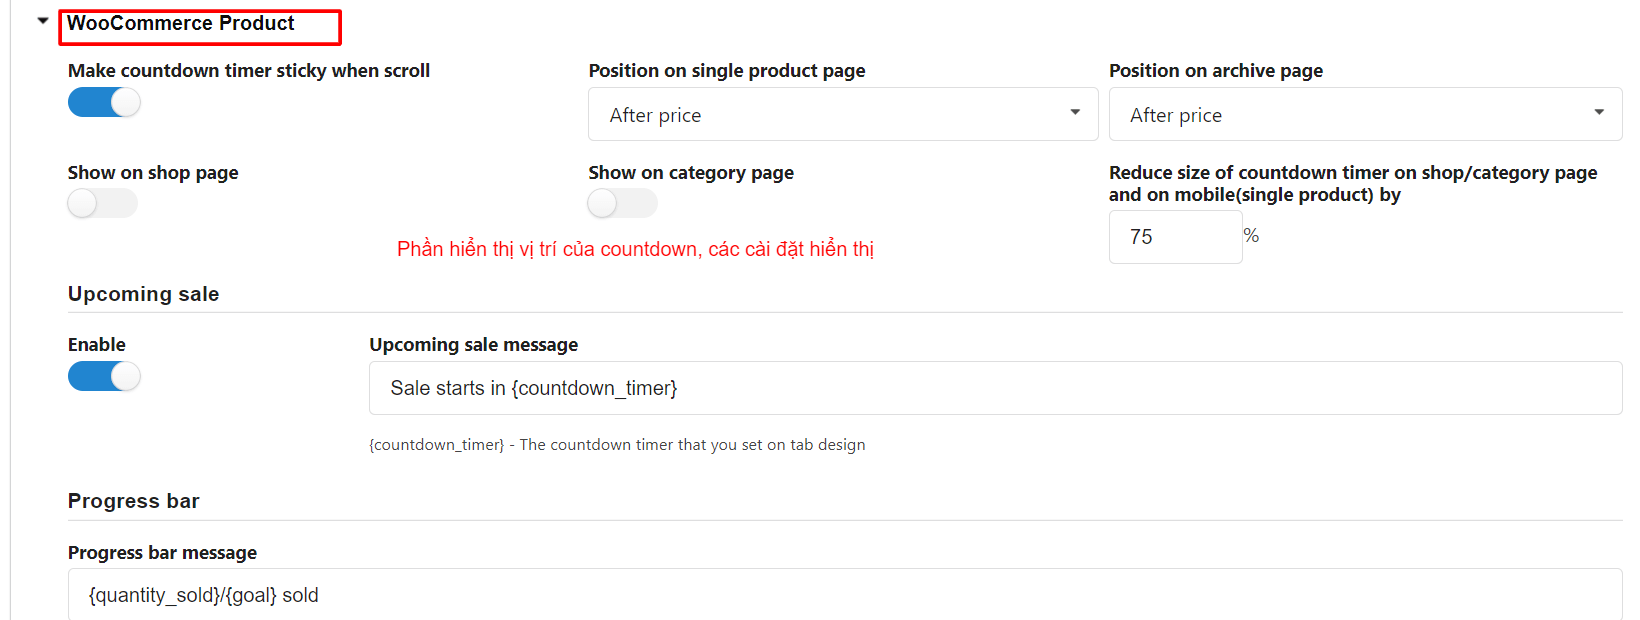
- WooCommerce Product settings:
This is where the magic happens. You can choose where to display the countdown, show it on the shop page, and even have a progress bar showing the number of products sold.

Once everything is set up, go to any product on your site and navigate to the schedule section. Select the attributes you want to apply the countdown to, and voila!

That’s it! Your WooCommerce product now has a cool countdown timer, making it more enticing for your customers. If you found this tutorial helpful, be sure to check out our WordPress tips section for more great content.
Don’t forget to follow our fan page for the latest articles and updates: Hocwordpress Group. Happy WordPress-ing!


