Database replication refers to the process of copying, distributing, and synchronizing data across multiple databases to ensure data integrity and availability. There are several benefits to database replication, including improved data availability, increased scalability, enhanced data protection, and better load distribution. However, there are also some disadvantages to consider, such as increased complexity, potential for data inconsistencies, higher costs, and additional maintenance requirements. Organizations should carefully weigh these pros and cons when deciding whether to implement database replication in their systems.
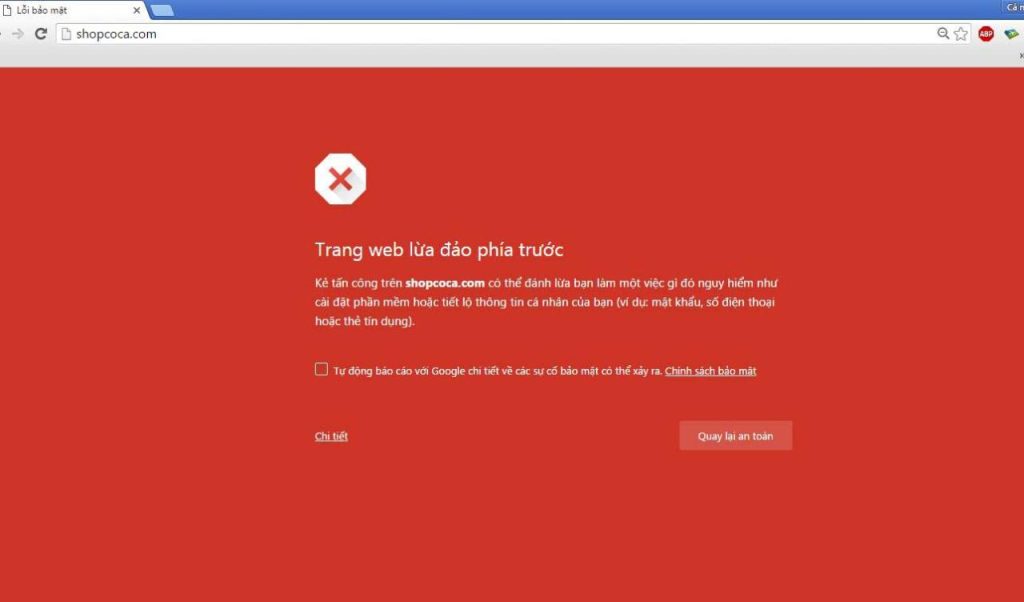
Every day, about 10,000 websites are given security warnings, attack indicators, and other suggested pages by Google. For website owners, this is really annoying because most visitors to that website will be blocked. Therefore, I will guide administrators on how to cancel the Google Blacklist warning and restore the page after being warned with the following 3 steps.
Step 1 – Review alert status
1.1 Identify website security warnings
The way Google determines whether to issue a Google Blacklist warning is by using algorithms to scan websites and find potential behaviors therein. To protect users, Google will flag a warning to that website on the search page, leading to a loss of about 95% of traffic. It is important to regularly check your website for any warnings and identify the type of Google Blacklist alert your site received. This will help you understand the issues or security risks found by Google on your site.
- Warning about malware on the website: Common malware warnings include viruses, spyware, rootkits, and ransomware.
- Warning about fraudulent websites: Indicates malicious or spontaneous ads on your website.
- Google Search warning: Warnings on search results page indicating spam or redirects found on your site.
1.2 Review Diagnostics Pages
Each red flag page links to another page, indicating the reasons for the website being listed on Google Blacklist. Visit the Google Transparency Report page, enter your site’s URL, and review the Site Safety Details and Testing Details sections to understand the problems your site is facing.
Step 2 – Fix errors in Google Blacklist
2.1 Remove Infection files
To remove malware from your site, edit files on the server or use a comprehensive website security platform. Features to consider include scanning, continuous monitoring, and cleaning of malicious code on websites. If using CMS like WordPress or Joomla, rebuild your site using original files and widgets from official repositories.
- Log in to the server via SFTP or SSH
- Create a backup of your website
- Search files for malicious domains and suspicious content
2.2 Clean hacked database tables
Use the database administration panel to connect databases and remove malware from database tables. Avoid removing common PHP malicious functions without ensuring they are not used by plugins or essential functions.
- Log in to the database administration panel
- Search for suspicious content in database tables
- Remove suspicious content and check website functionality
2.3 Prevent reinfection
To prevent hackers from accessing your site again, clean up user accounts, change passwords, and enable two-factor authentication. Ensure your computer is free from viruses to prevent further malware infections on the website.
Step 3 – Submit notification to Google
To remove the Google Blacklist warning, notify Google that you have removed malware from the site. Use Google Search Console to request a review of your site. It will take a few days for Google to consider your request.
Website protection
Prevent hackers from attacking your website by updating content, managing user privileges, and using a firewall for your website.
By following these steps, you can successfully remove Google Blacklist warnings and protect your website from potential security threats.


