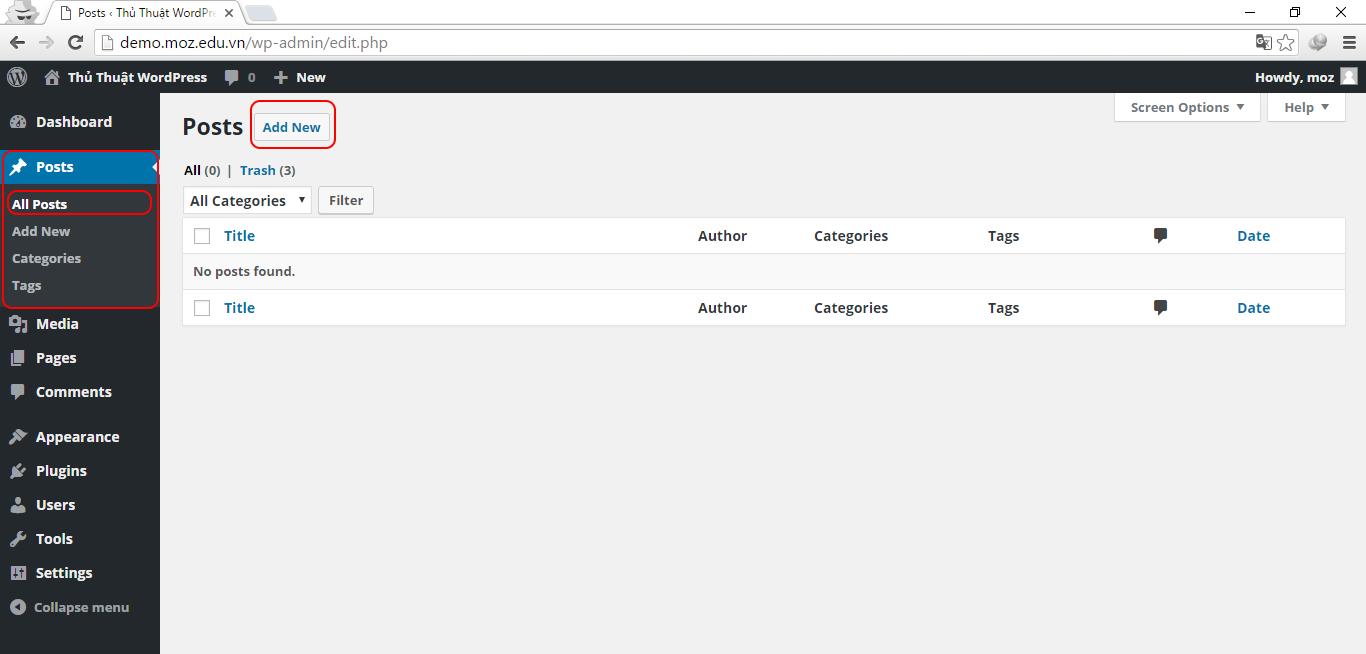
This article provides a guide on how to create a new post in WordPress. To start, log in to the admin dashboard, go to Posts > All Posts > Add New. Pay attention to the Title, content, and article configuration including Publish, Format, Categories, Tags, and Featured Image. You can save to Draft, preview, schedule a post, and publish your article. Categories help sort the post, add tags for organization, and use Featured Image to display an image. In the next article, editing the content of the post will be discussed.
In this article, I’ll show you how to create a new post in WordPress. To get started, log in to the admin panel, navigate to Posts > All Posts > Add New. Posts > Add New is the place to start.

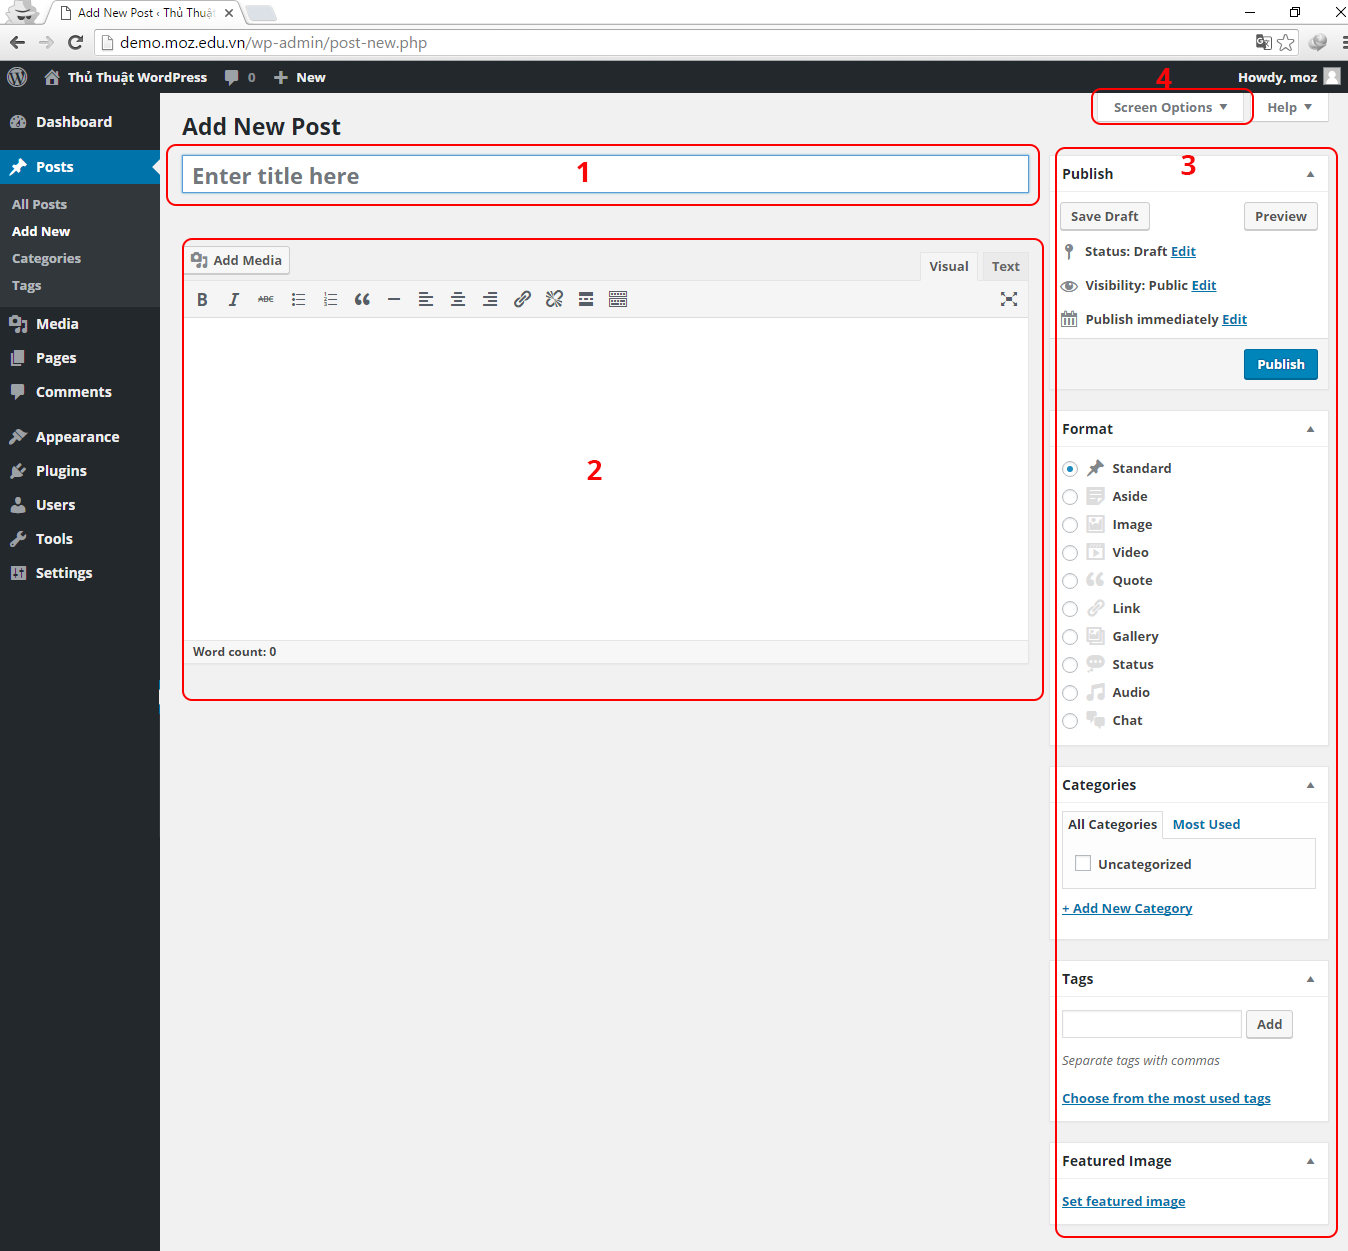
When creating a new post, focus on 3 key areas in the Add New Post section.

- Title: Give your post a catchy title.
- Content: Fill in the main body of the post.
- The configuration of the article: This includes Publish, Format, Categories, Tags, Featured Image.
Additionally, you can access more configurations by going to Screen Options to make further adjustments.

Article configuration guide
Publish
- Save Draft: Save your work in progress.
- Preview: See how your article will look when published.
- Schedule: Set a future publish date.
- Publish Button: Finalize and publish your post.
Format
Choose the type of post you’re creating.
Categories
Organize posts into specific categories. More details on this in upcoming posts.
Tags
Add descriptive tags to categorize your post.
Featured Image
Display a prominent image at the top of your post.
Epilogue
Next, I’ll guide you on using item number 2 to edit your post’s content.
Series Navigation:
- Managing Posts in WordPress >>
- Use Visual Editor to edit posts in WordPress >>


