Creating a button on the WordPress menu bar is simple and can help attract users’ attention to events or products on your website. By adding custom CSS classes to menu items and incorporating CSS snippets in the WordPress theme customizer, you can easily design an eye-catching button with different styles and effects. This tutorial provides step-by-step instructions on how to create a button on the WordPress menu bar without the need for any plugins. By following these instructions, you can customize your website interface to enhance user experience and engagement.
Creating a Button on the WordPress Menu bar is a straightforward process. When visitors land on your website, their eyes are typically drawn to the Menu bar first. If you want to highlight a specific event or product to grab their attention, this article is for you.
Why Create a Button on the Menu Bar?
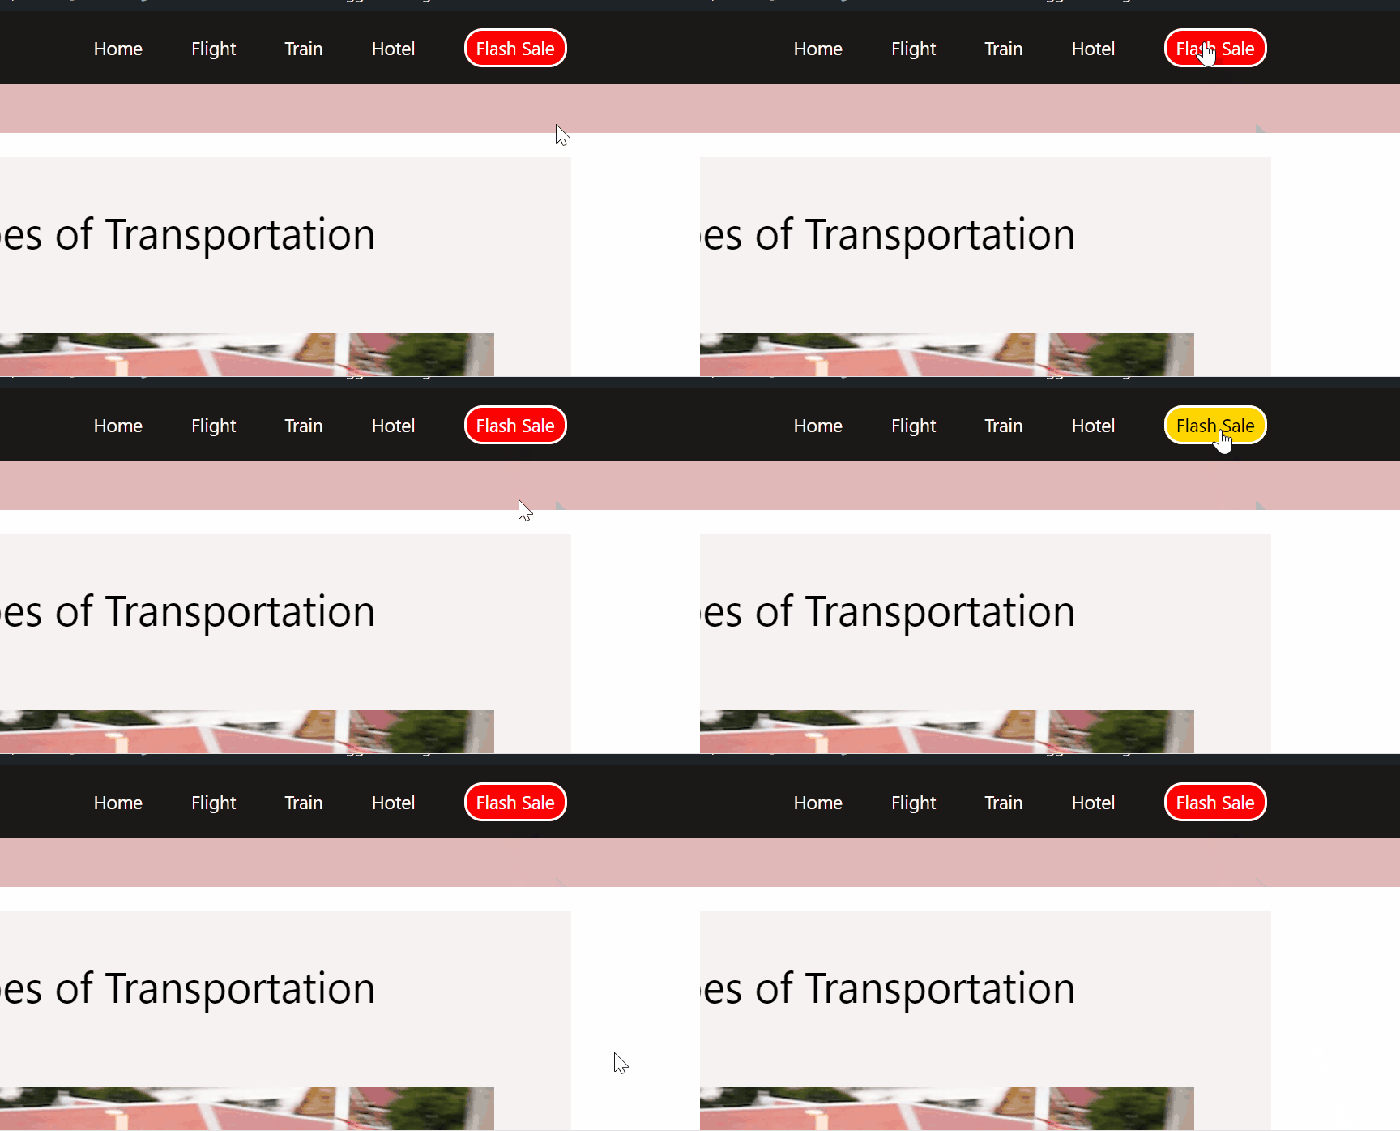
Adding a Button with an eye-catching color to the Menu bar can spark users’ curiosity. When users find something interesting, they are more likely to click on that Button. This feature is especially useful for promoting products or events on your website.
Take a look at the Demo below to see how integrating a Button onto the Menu bar can make it stand out and attract users.

Alright, let’s dive into the steps to create a Button on the WordPress Menu bar.
How to Create a Button on the WordPress Menu bar
You don’t need to install any plugin for this method. By following the steps below, you can add a beautiful Button to your WordPress Menu bar effortlessly.
Step 1: Add CSS to Menu
Start by logging in to your WordPress admin page and accessing the Menu Interface under Appearance > Menus.
Once you’re in the menu settings screen, select the menu item you want to transform into a Button. Click on the drop-down button next to Navigation Label.
Next, add a CSS class to the Navigation Label using the <span></span> tag. Assign a name to the CSS class, for example, button-menu-item.
Step 2: Add Custom CSS
Now, we’ll add a CSS snippet to the WordPress theme customizer. Navigate to Appearance > Customize on your WordPress dashboard.
Copy the CSS code below and paste it into the Additional CSS section.
.button-menu-item {
background-color: #fc0303;
padding: 4px 8px;
border-style: solid;
border-width: 2px;
border-color: #ffffff;
border-radius: 15px;
}

.button-menu-item:hover {
color: #000000;
background-color: #ffd500;
}
Explanation of CSS Code
- .button-menu-item: Defines the Button style.
- background-color: Sets the button’s background color to red.
- padding: Adds space between the button’s content and the border.
- border-style: Sets the button’s border style to a solid line.
- border-width: Sets the button’s border width.
- border-color: Sets the color of the button border.
- border-radius: Rounds the corners of the button.
The .button-menu-item:hover class defines the style of the Button on hover.
Feel free to customize the attribute values to match your design preferences for the Buttons on the menu.
Conclusion
With just a few simple steps, you can professionally integrate a Button into your Menu. Customize it according to your preferences to enhance user experience. By following this guide, you can add a unique touch to your website and make navigation more engaging.


