This content provides a guide on customizing the WordPress admin dashboard by removing unnecessary default widgets and adding custom widgets. The process involves adding code to the functions.php file of the theme to delete specific widgets from the dashboard. Additionally, it explains how to create a custom widget for a newsfeed section on the dashboard. The content also includes HTML and CSS code snippets for customizing the appearance of the new widget. Overall, the guide aims to help users clean up and personalize their WordPress admin dashboard to improve their user experience.
Do you feel overwhelmed by the cluttered and unnecessary parts of the WordPress admin dashboard? Well, I’m here to help you customize it to your liking.
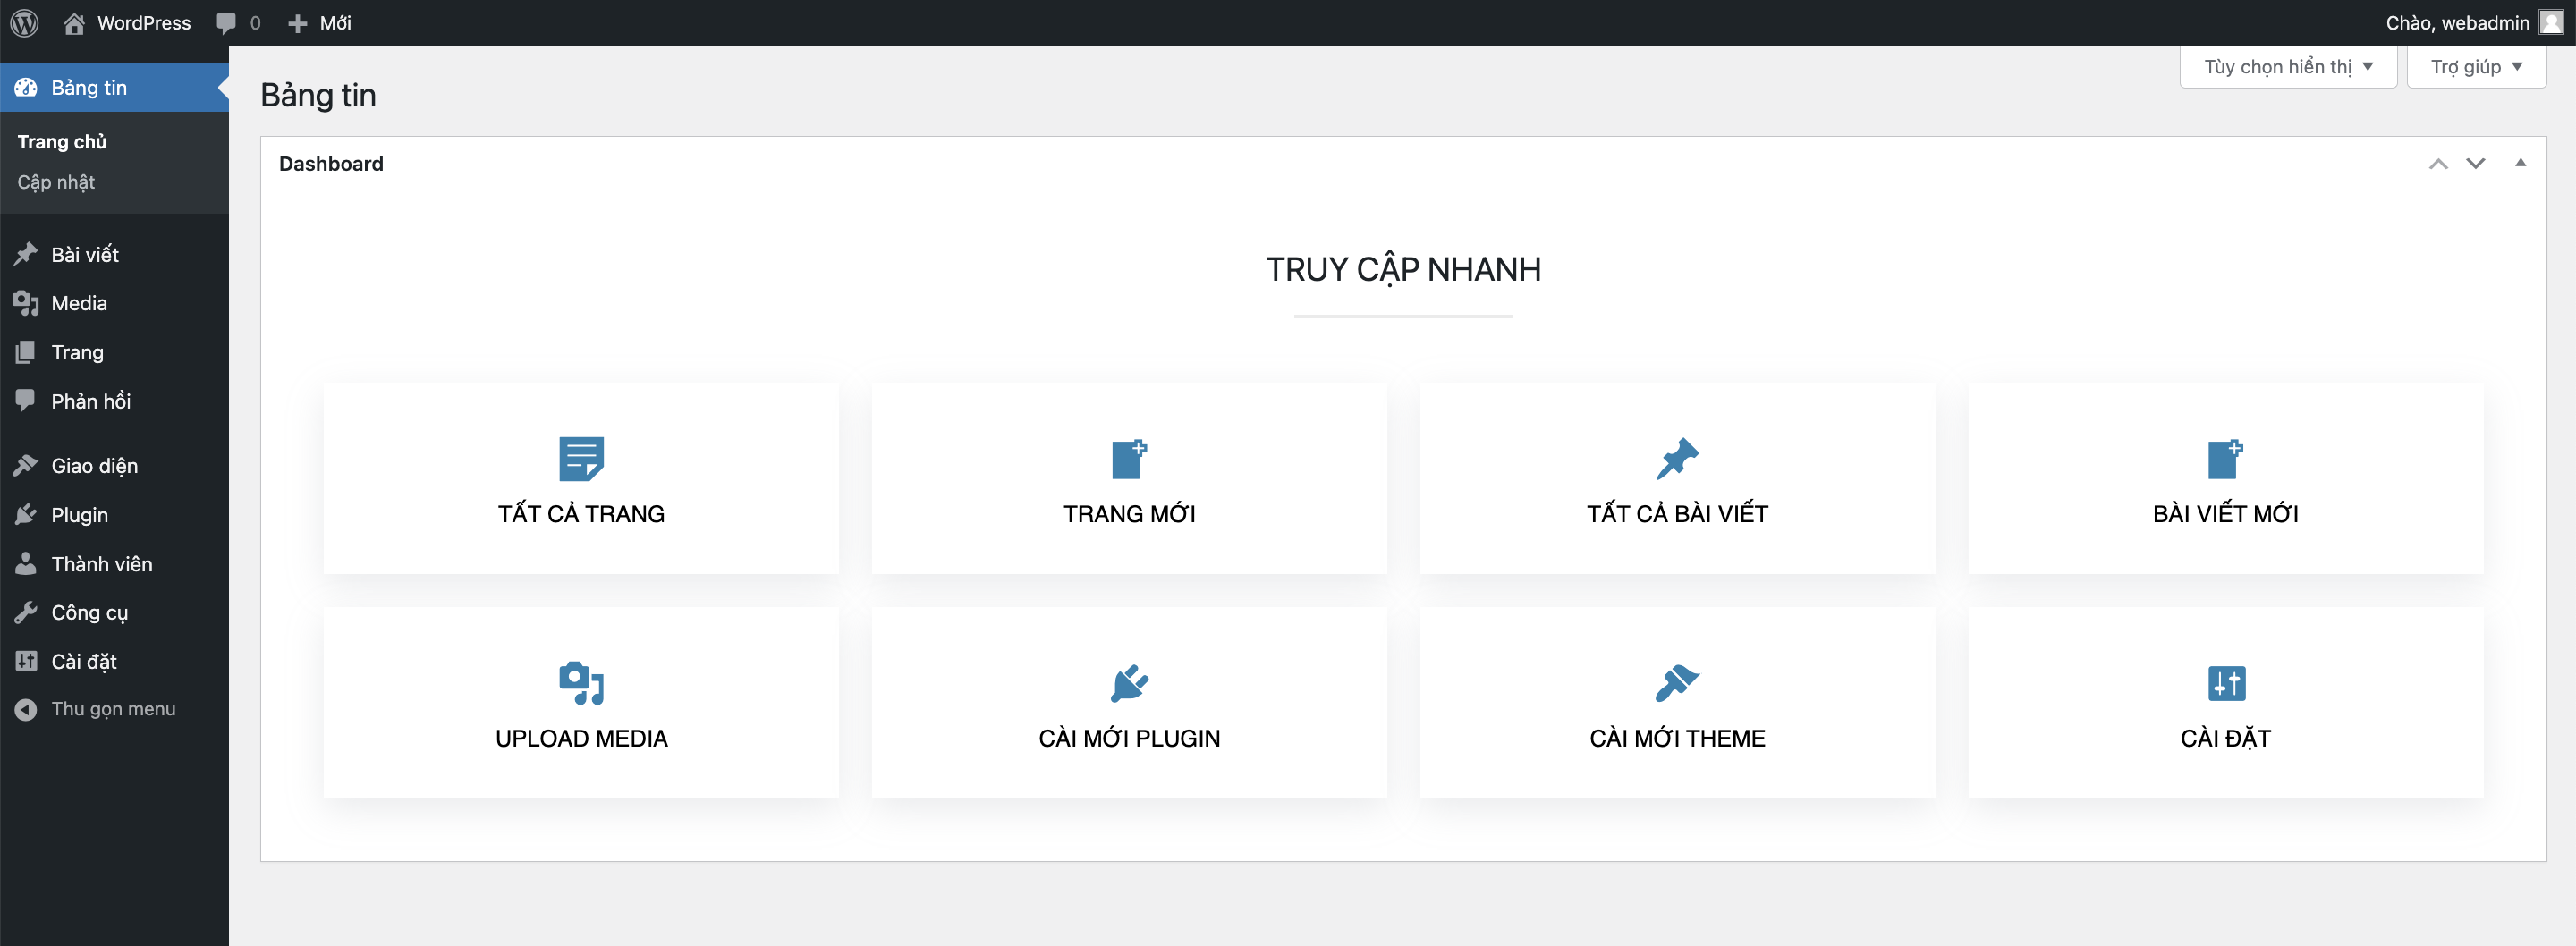
If you follow my instructions, you can achieve a clean and personalized dashboard interface like the one shown in the image below:

Delete WordPress default widgets
By default, the WordPress dashboard comes with various widgets. To declutter your dashboard, you can remove them using the following code added to the functions.php file of your theme:
function hk_remove_dashboard_widgets() {
    global $wp_meta_boxes;

    remove_meta_box( 'dashboard_primary','dashboard','side' ); // WordPress.com Blog
    remove_meta_box( 'dashboard_plugins','dashboard','normal' ); // Plugins
    remove_meta_box( 'dashboard_right_now','dashboard', 'normal' ); // Quick Draft
    // Keep the widgets you need by commenting out the ones you want to retain
}
add_action( 'wp_dashboard_setup', 'hk_remove_dashboard_widgets' );
Create custom widget in newsfeed
To create a custom widget in the newsfeed section, add the following code to your functions.php file:
function hk_welcome_dashboard() {
    global $wp_meta_boxes;
    wp_add_dashboard_widget('custom_support_widget', 'Dashboard', 'hk_dashboard_content');
}

function hk_dashboard_content() {
    // HTML code for dashboard content
}

add_action('wp_dashboard_setup', 'hk_welcome_dashboard');
From line 8 to line 38 in the code above is where HTML is used to create the dashboard interface. Starting from line 40, you can customize and design the interface further with CSS according to your preferences.
After completing these steps, go back to the Dashboard page to see the changes you’ve made.
Closing Thoughts
That’s all about customizing the dashboard in WordPress. If you found this article helpful and time-saving, feel free to share it. Additionally, for more tricks and tips related to WordPress, explore our other WordPress Tricks articles and follow our Fanpage to stay updated on new posts.
Did you enjoy this guide on customizing the WordPress admin dashboard? Let me know in the comments or through our rating system below:
Rating: 4.2 out of 5 (5 votes)
Enjoy customizing your WordPress dashboard! 🚀


